| LIBROW | ® |
| Products | Solutions | Vehicles | Articles | Inquiry | Contacts | My account |
Article 22
Diffusion filter II — speckle noise reduction
Limited offer
Professional Librow Calculatorvisit
for free
- Bessel functions
- gamma function
- complex numbers
7.4 MB for Windows
 |
Download diffusion filter demo for Win32 (zip, 163 kB) |

1. Introduction
Today ultrasound and magnetic resonance imaging are essential tools for noninvasive medical diagnosis. One of the fundamental problems in this field is speckle noise, which is a major limitation on image quality especially in ultrasound imaging. The presence of the speckle noise affects image interpretation by human and the accuracy of computer-assisted diagnostic techniques. Low image quality is an obstacle for effective feature extraction, analysis, recognition and quantitative measurements.
2. Diffusion filter characteristics
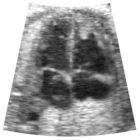
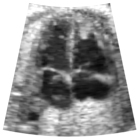
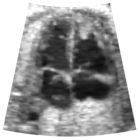
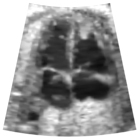
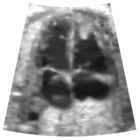
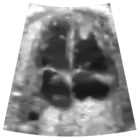
The key point in effective speckle noise removing is balance between speckle suppression and feature preservation. Diffusion filter is an effective technique for goal achievement. Behind this development is solution of partial differential equation (PDE) of transient permeability for 2D domain. Due to its nonlinear nature and adaptive anisotropy the filter has excellent both speckle reduction and detail preserving properties. This advanced version of the filter has embedded space control feature that allows to reduce blur produced by diffusion — fig. 1.
| a. |
|
b. |
|
c. |
|
| d. |
|
e. |
|
f. |
|
Fig. 1. Original ultrasound image (a) and result images processed by diffusion filter (b–f) for dimensionless time T={2, 4, 8, 16, 32} respectively. Filter parameters: isotropy — 20; sensitivity — 0.4; space control threshold — 10.
Effective realization of the diffusion algorithm allows using of the filter for real-time image processing in medical and industrial devices.
3. Diffusion filter versus median filter
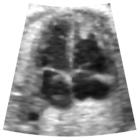
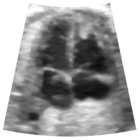
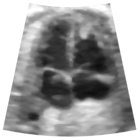
Another widely used despeckle technique is median filter. The advantage of the median filter is its simplicity and algorithmic straightforwardness. But due to its nonadaptive nature it deteriorates not only speckles but details as well. In fig. 2 we show the results of despeckling by median filter for the same ultrasound image. Compare result with the output of the diffusion filter in fig. 1.
| a. |
|
b. |
|
c. |
|
Fig. 2. Despeckling by median filter: ultrasound image after first (a), second (b) and third (c) passes.
4. Application in image editing
Diffusion filter could be used in color image editing for image quality improvement and noise removing. In fig. 3 you can see an original color image with details of interest highlighted.

|

|

|

|
Fig. 3. Original color image and its fragments.
Processing by diffusion filter brings gentle softening into the image — fig. 4.

|

|

|

|
Fig. 4. Color image processed by diffusion filter.
Filter parameters: isotropy — 10; sensitivity — 0.7; space control threshold — 10; time — 1.4.
Pay attention to the excellent edge preserving characteristics of the filter. It is of interest to compare diffusion filter with mean, or average one (fig. 5) which brings much more blur into the image while softening image colors.

|

|

|

|
Fig. 5. Color image processed by weighted mean, or average filter with 3×3 window.
On the other hand traditionally used for despeckle median filter though preserving details brings more distortions into the picture — fig. 6.

|

|

|

|
Fig. 6. Color image processed by weighted median filter with 3×3 window.
As conclusion we can say that diffusion filter behaves as adaptive averaging technique that smoothes speckles while preserving image features.
5. Diffusion filter parameters
The filter has a set of parameters to adjust filter performance according to image quality and target result.
- time step — since the problem to be solved is a transient one, this parameter is an advancing in time;
- isotropy — influences local anisotropy of the filter;
- sensitivity — sensitivity of the filter towards speckle noise presence;
- threshold — tolerance value of filter space control feature, brings additional nonlinearity into diffusion based on local space information.
6. Effect of space control feature
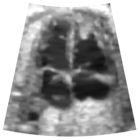
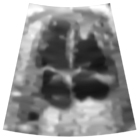
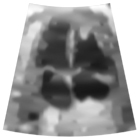
As was mentioned above space control feature reduces blur produced by diffusion. To estimate effect of the space control compare images in fig. 6 with corresponding ones in fig. 1. Images in fig. 6 were produced by filter with the same settings but disabled space control.
| a. |
|
b. |
|
c. |
|
Fig. 6. Diffusion despeckle (a–c) for dimensionless time
T={8, 16, 32} respectively.
Filter parameters: isotropy — 20; sensitivity — 0.4; space control disabled.
For color images the effect of space control is noticeable as well — fig. 7 — compare it with fig. 4. Space control results in sharper images with more details preserved.

|

|

|

|
Fig. 7. Color image processed by diffusion filter.
Filter parameters: isotropy — 10; sensitivity — 0.7; time — 1.4; space control off.
7. Diffusion filter demo
 |
Download diffusion filter demo for Win32 (zip, 163 kB) |
Filter demo application can load 24-bit bitmaps files of up to 128×128 size. If the image exceeds the size it will be truncated. To process an image start the application and load bitmap — fig. 8.
 Fig. 8. Diffusion filter demo application.
Choose Set >> Preferences or click Preferences button in toolbar and set filter parameters — fig. 9. For instance, you can set filter Time step to 0.2, Isotropy to 10, Sensitivity to 0.7, enable Space control, set its Threshold value to 10 and set number of Iterations to 7. Click OK to confirm your settings.
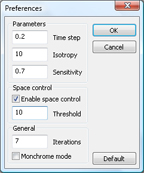 Fig. 9. Diffusion filter preferences dialog.
Time step times the number of Iterations defines the overall diffusivity progress in time, thus in our case dimensionless time T=0.2×7=1.4. For the same overall time the smaller time step gives more accurate result. So you can get the same diffusion setting Time step to 0.7 and number of Iterations to 2, which gives again T=0.7×2=1.4, but the result will be less accurate. Now click F-button in toolbar or choose Set >> Filter to process image.
Use B-button in toolbar or Set >> Background menu item to set appropriate background for your image. If your image is grayscale one you can check Monochrome mode check-box in Preferences dialog to speed up diffusion filtering.
8. Available options and modifications
For diffusion filter library available the following options and modifications.
- Adaptation and interface change according to custom requirements.
- Version for embedded application.
- Speed optimized version for Intel processor family.
- Extension for 3D voxel graphics processing.
- Diffusion filter module supplied as dynamic link library (DLL) or standalone application.
|
|
|||||||||||||
|
|||||||||||||


